Luxy Hair Effortless Tape-In Application and Removal Guide
 Updated
by
Mikayla Cabarcas
Updated
by
Mikayla Cabarcas
Before you begin
Prep your Hair
- Shampoo your hair with a clarifying shampoo only. Do not use conditioner. Clean hair ensures stronger tape adhesion.
- Avoid applying oils, masks, or leave-in products anywhere on your hair.
- Blow-dry your hair completely smooth until it is 100% dry.
- For a natural bend at the roots, lightly flat iron the root area so wider wefts sit flat and secure.
Section your Hair
- Create a clean, even guideline around the perimeter of your head.
- Leave enough natural hair out around the hairline and nape to hide the extensions.
- Work in neat, horizontal sections to maintain consistent tension and placement.
- Ensure each section you create is approximately as wide as the 3” weft for optimal fit.
Installation
Clean Partings
- Take thin, even slices of hair for each tape-in.
- Each slice should be fine enough that light can pass through it. This ensures proper bonding.
- Avoid including short, broken, or uneven hairs that may weaken the hold.
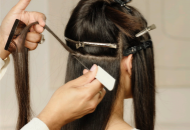
Placement
- Remove the backing from the bottom tape weft.
- Place the weft roughly ¼” below the scalp without touching the scalp directly.
- Ensure the weft lies flat with no bending or buckling.
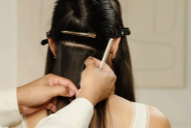
Create the "Sandwich"
- Lay the hair evenly over the bottom weft.
- Align the top weft precisely with the bottom weft.
- Press firmly to secure both pieces together.
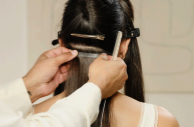
Seal
- Apply firm, even pressure across the full 3” width to secure the adhesive bond.
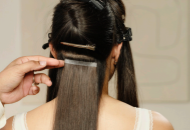
Check Movement
- Confirm that the tape-in moves naturally with the hair.
- There should be no tightness, pulling, or tension.
- Once released, the natural hair should fall smoothly.
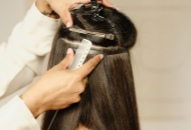
Continue up the Head from Bottom to Top
- Slightly stagger rows as needed to enhance blend and avoid stacking.
- Do not place wefts too close to the hairline or crown for natural-looking results.
- Leave approximately ¼” between tape tabs. The tabs should sit side-by-side but never overlapping or touching.
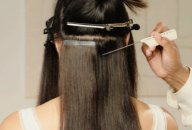
Removal
Isolate the Weft
- Work on one tape-in “sandwich” at a time.
- Cleanly separate surrounding hair to avoid tangling.
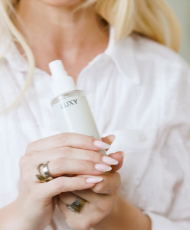
Apply Remover
- Fully saturate the tape area with Luxy Tape-In Extension Remover.
- Allow the product to sit for 10-30 seconds to break down the adhesive.
Gently Separate
- Use fingers or a tail comb to gently peel the tapes apart.
- Never tug, force, or pull. Avoid causing strain on the hair.
Remove Residue
- Apply additional remover if necessary.
- Carefully comb out remaining residue from the hair.
- Wash thoroughly to remove all adhesive traces.
Reinstallation
Clean Extensions
- Remove all old tape from each weft
- Use Luxy Tape-In Extension Remover to clean off any leftover residue.
- Allow the wefts to dry completely before applying new tape.
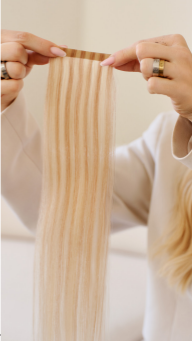
Apply New Tape
- Apply fresh replacement tape evenly from edge to edge across the 3” base.
- Press firmly to secure.
Prep the Hair Again
- Shampoo with a clarifying shampoo only.
- Do not apply conditioner near the roots.
- Blow-dry the hair fully and smoothly.
Reinstall
- Repeat the full installation process.
- Avoid placing wefts in the exact same spots as before to maintain hair health.
- Slightly shift positions to encourage proper growth.
Tips
Troubleshooting guide
Extensions are Slipping
Possible Causes:
• Natural scalp oils or conditioner near the roots
• Improper installation
• Insufficient pressure applied to tape tabs during application
Solutions:
• Wash hair with a clarifying shampoo before installation
• Avoid conditioner near the scalp
• Keep oily products away from the roots
• Apply firm pressure when sealing
Extensions Not Sticking
Possible Causes:
• Hair wasn’t completely clean or dry
• Sections are too thick or too thin
Solutions:
• Ensure hair is 100% dry and free of product
• Use thin, even sections and apply the “sandwich” method correctly
Matting or Tangling at the Roots
Possible Causes:
• Infrequent brushing
• Natural shedding trapped within tape tabs
Solutions:
• Brush gently 2–3 times daily, focusing near the roots
• Use a loop brush or extension-safe brush
Itching or Scalp Irritation
Possible Causes:
• Product buildup
• Excessive tension during installation
• Messy sections during the installation
Solutions:
• Wash regularly with an extension safe shampoo.
• Avoid scratching; gently pat the area instead
• Keep sections neat to avoid hair being placed between tape tabs that don’t belong
• If irritation is severe, remove the extensions
Visible Tape Tabs
Possible Causes:
• Extensions placed too close to the hairline or part
• Hair is too fine to fully conceal tabs
Solutions:
• Reposition extensions slightly lower or deeper into the hair
• Reduce the number of extensions applied, and/or cut extensions in half for more flexible placement.
Extensions Feel Heavy or are Pulling
Possible Causes:
• Sections are too large or too many extensions are used
• Extensions installed too close to the scalp
Solutions:
• Remove the extensions and re-apply using proper application steps
• Ensure you drop the extensions a little lower at the scalp to avoid excessive tension
